Best Deck Stain for Ontario: Oil-Based vs Water-Based
Compare oil-based vs water-based deck stains for Ontario's freeze-thaw climate. Real 2026 pricing, durability data, and application tips for KWC homeowners.
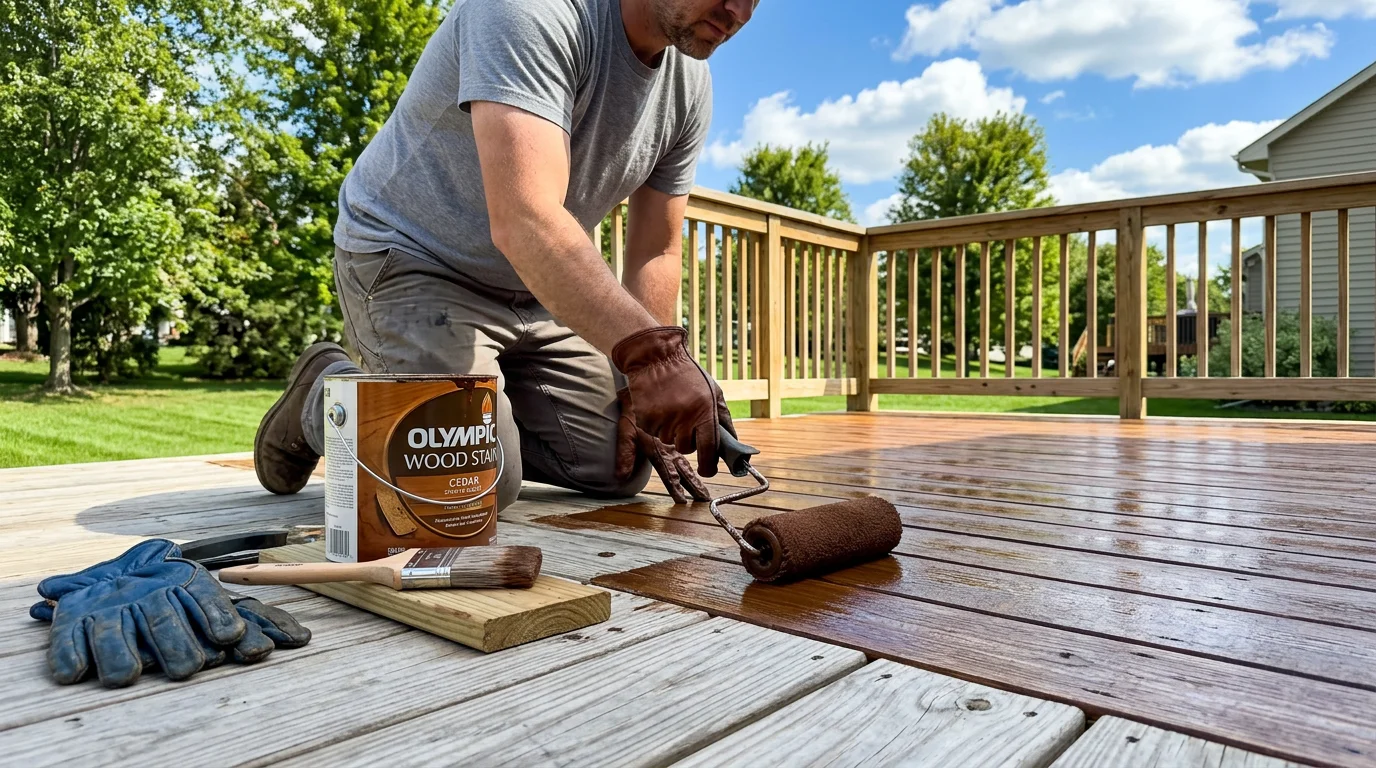
You're standing in the aisle at Home Depot or Castle Building Centres in Kitchener, staring at thirty different deck stain options. Half say "oil-based," half say "water-based," and the price difference is significant. Which one will actually survive Ontario's freeze-thaw cycles without peeling off next spring?
The answer depends on your deck's wood type, age, sun exposure, and how much maintenance you're willing to do. Here's what actually matters.
Oil-Based vs Water-Based: The Key Differences
Oil-based stains (alkyd or natural oil) penetrate deep into wood fibers. They're typically semi-transparent or solid, offering rich color and excellent water repellency. In Ontario's climate, they provide superior protection against moisture infiltration during freeze-thaw cycles.
🏗️ Planning a deck project?
Get a free manual project review, or visualize your dream deck with AI before requesting quotes.
Water-based stains (acrylic or latex) sit more on the surface, forming a flexible film. They dry faster, clean up with soap and water, and emit fewer VOCs. They're easier to work with but generally require more frequent reapplication.
Performance in Ontario's Climate
Ontario throws everything at your deck: -25°C January nights, +35°C July afternoons, spring snowmelt, summer thunderstorms, and that brutal freeze-thaw cycle from March through early April.
Oil-based stains handle this better. They penetrate 2-3mm into wood (vs 0.5-1mm for water-based), so moisture has a harder time getting underneath and causing delamination. When water freezes inside wood and expands, oil-based stains flex with the wood rather than cracking and peeling.
Water-based stains have improved dramatically since 2020, but they still tend to fail at the surface when moisture gets trapped underneath during freeze-thaw. You'll see this as peeling or flaking, usually starting on horizontal surfaces like deck boards and stair treads.
Oil-Based Deck Stains: Pros and Cons
Advantages
- Deep penetration: Gets into wood grain, moves with expansion/contraction
- Longer lifespan: 3-5 years between recoats on horizontal surfaces in KWC (vs 2-3 years for water-based)
- Better moisture barrier: Critical for pressure-treated wood that's still releasing moisture
- Richer color depth: Especially on cedar and exotic hardwoods
- Easier maintenance: Often just needs cleaning and a fresh coat without sanding
Disadvantages
- Longer dry time: 24-48 hours between coats (vs 2-4 hours for water-based)
- VOC content: Stronger odor during application, requires mineral spirits for cleanup
- Temperature sensitivity: Must apply above 10°C and below 32°C — trickier in Ontario's variable spring/fall weather
- Higher cost: $45-85/gallon vs $35-65/gallon for water-based (2026 KWC pricing)
Best Oil-Based Stains for Ontario
- Sikkens Cetol DEK Finish: Premium choice, $75-85/gallon, excellent UV resistance, 4-5 year recoat cycle
- Cabot Australian Timber Oil: $55-70/gallon, deep penetration, great for hardwoods and cedar
- TWP (Total Wood Preservative) 1500 Series: $60-75/gallon, popular with Ontario contractors, excellent freeze-thaw performance
- Benjamin Moore Arborcoat Oil Stain: $50-65/gallon, good mid-range option with solid coverage
Coverage: 150-250 sq ft per gallon depending on wood porosity and application method.
Water-Based Deck Stains: Pros and Cons
Advantages
- Fast drying: Recoat in 2-4 hours, finish a deck in one day if weather cooperates
- Easy cleanup: Soap and water, no mineral spirits required
- Lower VOCs: Less odor, safer for enclosed areas or proximity to neighbors
- UV stable: Modern acrylics resist color fading better than older formulations
- Won't darken over time: Maintains original color better than oils
Disadvantages
- Shorter lifespan: 2-3 years on horizontal surfaces in Ontario climate
- Surface film: More prone to peeling when moisture gets underneath
- Requires better prep: Wood must be perfectly clean and dry, or adhesion fails
- Less forgiving: Mistakes harder to fix, shows lap marks if not applied carefully
- Performance on new pressure-treated: Struggles to bond with wood that's still releasing preservatives
Best Water-Based Stains for Ontario
- Behr Premium Advanced Deckover: $50-65/gallon, thick-bodied, good for older decks with minor imperfections
- Olympic Maximum Stain & Sealant: $45-60/gallon, solid coverage, available at most KWC retailers
- Benjamin Moore Arborcoat Waterborne Stain: $55-70/gallon, excellent UV resistance
- CIL Premium Deck Plus: $40-55/gallon, Canadian-made, formulated for our climate
Coverage: 200-300 sq ft per gallon on previously stained wood; 150-200 sq ft on bare wood.
Which Stain Type for Which Wood?
Pressure-Treated Lumber
Wait 6-12 months after installation before staining. The wood needs to dry below 15% moisture content, and preservatives need to leach out.
Best choice: Oil-based semi-transparent stain. Pressure-treated wood continues releasing moisture for months after installation. Oil-based stains handle this moisture better and won't trap it underneath.
If you must use water-based (faster project timeline, lower VOC concerns), wait a full year and ensure moisture content is below 12% using a pin-type moisture meter ($25-50 at Home Depot).
See pressure-treated deck maintenance for detailed timing guidance.
Cedar Decking
Cedar is naturally rot-resistant but needs UV and moisture protection to maintain its color.
Best choice: Oil-based penetrating stain (transparent or semi-transparent). Cedar's open grain structure absorbs oil stains beautifully, and the deep penetration protects the wood without hiding its natural beauty.
Application tip: Apply within 2-3 months of installation while the wood is still fresh. If cedar has already weathered to gray, you'll need to clean it with a wood brightener first ($20-30 for a deck-sized batch).
Composite Decking
Most composite decking shouldn't be stained at all — it's designed to be maintenance-free. However, some first-generation composite products (pre-2015) can benefit from specialized composite stain.
If you must stain composite: Use only water-based stains specifically formulated for composite materials. Oil-based stains won't penetrate and will just create a sticky, uneven film.
See composite deck maintenance for proper cleaning methods instead of staining.
Exotic Hardwoods (Ipe, Tigerwood, Cumaru)
These dense hardwoods require specialized treatment.
Best choice: Penetrating oil-based stain or pure tung oil. These woods are so dense that film-forming stains won't adhere properly. You need a product that penetrates, even if only 1-2mm deep.
Reality check: Expect to recoat annually with hardwoods. Their density prevents deep penetration, so stains wear off faster from foot traffic.
Application Tips for Ontario Climate
Timing Your Project
Ideal conditions:
- Temperature: 15-25°C
- Humidity: Below 70%
- No rain for 48 hours before or after application
- Wood moisture content: Below 12-15%
Best months in KWC: Late May through September. Avoid April (too wet, unpredictable freezes) and October (risk of unexpected rain or early frost).
Early morning application works well in July/August — you avoid intense midday UV that causes stain to dry too quickly and prevents proper penetration.
Surface Preparation
This matters more than your choice of oil vs water-based stain.
For new wood:
1. Let pressure-treated lumber dry 6-12 months minimum
2. Clean with deck cleaner to remove mill glaze ($15-25)
3. Apply wood brightener to open pores ($20-30)
4. Let dry 48 hours minimum
For previously stained decks:
1. Power wash at 1,000-1,500 PSI (higher pressure damages wood fibers)
2. Strip old stain if it's peeling using deck stripper ($25-40/gallon)
3. Sand rough spots with 60-80 grit sandpaper
4. Apply wood brightener
5. Rinse thoroughly, let dry 48-72 hours
Moisture test: Sprinkle water on the deck. If it beads up, the wood's not ready for stain. If it soaks in within 5-10 minutes, you're good to proceed.
Application Method
Brushing: Best control, forces stain into wood grain, required for railings and vertical surfaces. Use a 4-inch deck stain brush ($12-25) with synthetic bristles for water-based, natural bristles for oil-based.
Rolling: Faster for large flat areas. Use a 3/8-inch nap roller ($8-15) designed for stain application. Back-brush immediately after rolling to work stain into the grain.
Spraying: Fastest but requires back-brushing anyway and wastes material. Only worth it for decks over 500 sq ft. Requires airless sprayer ($200-500 purchase or $75-100/day rental from Home Depot).
Application rate: Don't flood the surface. Two thin coats outperform one thick coat. Apply until wood stops absorbing, then stop — excess stain just creates a sticky mess that won't cure properly.
Drying and Curing
Oil-based stains:
- Dry to touch: 12-24 hours
- Recoat window: 24-48 hours
- Light foot traffic: 48-72 hours
- Full cure: 7-14 days (no furniture until fully cured)
Water-based stains:
- Dry to touch: 1-2 hours
- Recoat window: 2-4 hours
- Light foot traffic: 24 hours
- Full cure: 3-7 days
In Ontario's humid summer conditions, add 20-30% to these timelines.
Cost Comparison: DIY vs Professional
DIY Costs (300 sq ft deck, typical KWC size)
Materials:
- Deck cleaner: $20-30
- Wood brightener: $20-30
- Stain (2 gallons): $90-170 (oil-based) or $70-130 (water-based)
- Brushes/rollers: $25-40
- Painter's tape: $10-15
Total DIY cost: $225-285
Time investment: 8-12 hours over 2-3 days (cleaning, prep, two coats, cleanup)
Professional Staining Costs
KWC contractors typically charge $2.50-4.50 per sq ft for complete deck staining (cleaning, brightening, two coats).
300 sq ft deck: $750-1,350
500 sq ft deck: $1,250-2,250
The premium buys you proper equipment (pressure washer, commercial sprayers), experience with application timing, and warranty on workmanship. Most contractors guarantee their staining work for 2-3 years.
See deck quote checklist for questions to ask when comparing contractor quotes, and our deck cost in Ontario guide to understand how staining fits into total project budgets.
Maintenance Schedule
Oil-Based Stain Maintenance
Year 1-2: Clean annually with deck cleaner, inspect for wear on high-traffic areas
Year 3-4: Recoat high-traffic areas (stairs, walkways)
Year 4-5: Complete recoating. Clean, brighten, apply single maintenance coat
Water-Based Stain Maintenance
Year 1: Clean annually with mild detergent
Year 2-3: Full recoating. Light sanding of peeling areas, clean, brighten, two coats
Warning Signs You Need to Restain
- Water no longer beads on the surface (soak test fails)
- Wood grain visible through stain
- Color has faded significantly from original
- Peeling or flaking on horizontal surfaces
- Gray or weathered appearance returning
Don't wait until your deck looks terrible. Once UV damage penetrates past the stain layer, you're looking at much more aggressive prep work (sanding, possibly stripping) before restaining.
Common Questions
Can I switch from oil-based to water-based stain on my existing deck?
Not recommended. Water-based stain won't properly adhere over oil-based residue, even if you strip thoroughly. You'd need to sand down to bare wood, which is labor-intensive and risks damaging deck boards. Stick with the same base (oil or water) for the life of the deck, or switch only when rebuilding.
How long do I need to wait after installing a new pressure-treated deck before staining?
6-12 months minimum in Ontario climate. Pressure-treated lumber arrives with 20-35% moisture content and needs to drop below 15% before staining. Summer installations (May-July) can usually be stained the following May. Fall installations (September-October) should wait until the following September. Use a moisture meter to verify — $25-50 at Home Depot, worth the investment. See pressure-treated deck maintenance for detailed guidance.
Is semi-transparent or solid stain better for Ontario decks?
Semi-transparent oil-based stain is the sweet spot for most KWC decks. It protects wood while letting grain show through, and it's easier to maintain (clean and recoat without extensive sanding). Solid stain offers more UV protection and hides imperfections but peels like paint when it fails — you'll be scraping and sanding before every recoat. Transparent stain looks beautiful but requires recoating every 1-2 years in Ontario's UV exposure.
Will deck stain protect against mold and mildew in Ontario's humid climate?
Quality deck stains include mildewcides, but they're not a substitute for proper ventilation and drainage. If your deck sits low to the ground with poor airflow, or if water pools on the surface, you'll get mold growth regardless of stain quality. Fix the underlying issues first — see deck drainage and water management and deck skirting ventilation. For existing mold, clean with oxygen bleach solution before restaining.
Can I apply deck stain in the fall, or is spring better?
Spring is better in KWC. Your deck needs 48 hours of dry weather and temperatures above 10°C after staining for proper curing. September is workable, but October gets risky — one unexpected cold snap or rainstorm ruins the application. Spring (late May through June) gives the stain all summer to cure and bond before winter stress arrives. If you must stain in fall, finish by mid-September and use a fast-cure formulation designed for cooler temperatures.
---
🎨 Not sure which material to pick?
Upload a photo of your backyard and see exactly how Trex, TimberTech, or cedar would look — free and instant.
See These Materials on Your Actual Deck
Still comparing materials? Upload a photo of your backyard and see exactly how each option looks on your space — in seconds, for free.
Try PaperPlan → — our AI deck visualizer lets you swap between Trex, TimberTech, cedar, and pressure-treated so you can pick with confidence before spending a dime.
Upload a backyard photo and preview real decking materials with AI — free, instant, no sign-up.
Permits, costs, material comparisons, and questions to ask before requesting quotes — delivered to your inbox.